Introduction
Bagels! One of my favorite on-the-go, anytime foods. I simply love bagels. I don't love buying them on campus. For what I spend on one, I could get a whole bag at the store, or make a few dozen myself. You can maybe guess I bought one today on campus, then decided to make my own this evening. I had some time to kill while I was making chicken stock and chicken soup, so I looked up the recipe in Joy of Cooking. Pretty simple.
Experimental Procedure
I mixed a cup of water with some yeast and sugar, as determined by Joy. Then I stirred in melted margarine as a substitute for shortening, then more sugar, salt and 1 cup of flour. This I mixed on low speed using my KitchenAid mixer (thank you Mom, Aunt Carla and Ashley!). Now I was supposed to gradually stir in 3 more cups of flour and I did. But it was supposed to be smooth and elastic. This dough was dry. So dry, a large portion of the flour was just chilling on the bottom of the bowl. I thought maybe my dough hook was doing it, so I started kneading it. It was just too dry. I added another cup of water, and that seemed to make things better. I let the dough sit to give the yeast time to do its thing, then I rolled some bagels. I made them smaller then normal bagels. I like my carbs, but not too many. They went into a pot of boiling water for a minute, then I coated the bottom in cornmeal. For half of them, I put minced garlic on top. Into the oven and cooked until golden brown!
Results and Conclusions
I'm not sure why my dough was so dry, or why it needed so much kneading (bagel tongue-twister!). This really bothered me because it seemed like something was just really off about how I made the bagels, but I followed the recipe closely. And the dough was very tough, not possessing a ton of elasticity. With my added water, I was able to make the dough at least. The bagels came out really tasty. The consistency was definitely correct for the bagels. I was worried I ruined it somehow since the dough was such a pain! I am convinced something is wrong with the recipe...
I was surprised the garlic worked, too. I just kind of stuck it on the tops of the bagels and hoped that was how it was done. Next time I will try something a little different for flavoring. I love sesame seed bagels, and I happen to have a bottle of sesame seed oil. I may just dribble a little of it into the dough and see if it flavors it like the seeds do. I love the taste, but I don't like how they get stuck in my teeth. I will also try making them with a little onion in the dough and on top. Flavored bagels help me avoid cream cheese, which just adds to the calories. (I AM trying to diet, despite some of the recipes I'm posting). I will keep you posted!
Thanks for reading!
Thursday, January 31, 2013
Results from the roast chicken!
A new format, to cater to my friends in the scientific community :)
Introduction
Remember a few days ago I made a whole roast chicken? It was almost 7.5 lbs. I was so psyched when it came out and tasted pretty good. But then I started to think, "What am I to do with all this chicken? Dan and I aren't going to eat 3 lbs each tonight..." I also began to worry about the fresh celery I had. I didn't want it to go bad. My root veggies will keep for much longer. So I began to plan...
Experimental Procedure
Dismantling a chicken
What did I think about? Well, first off I remembered a good cook saves the bones/carcass of the chicken to make stock. So I started cutting off the meat. That took about 15 minutes (I had to fight with a couple leg joints) and was a greasy adventure. I placed the meat in one freezer bag, and the carcass and bones in another. The bones went into the freezer, and the meat into the fridge. I had a lot of both white and dark meat. Triumphant after dismantling my chicken, I returned to the pan to collect the drippings. I got about two cups (including some fat floating around). This went into a storage container and into the fridge. Never forget how much flavor the drippings to your roast bird will have!
Chicken Stock
I put my thoughts about my chicken on hold for a day and sorted out what to do today (1/31). I started by making chicken stock. I took the drippings I had refrigerated and skimmed the fat off, which was solid and easily removed from the top of the drippings. I tossed the rest in a 5 quart stock pot with my chicken bones (covered in cold water) and simmered it for half an hour. To the stock I added the following (for flavor, not to eat): the peels from the carrots I roasted with the whole chicken, bits of onion I would've tossed and the tops of the celery stalks (with leaves and all) I cooked w/ the whole chicken. I found that people throw these things out (especially potato and carrot peels) but many people use them to flavor their stocks. After another half hour the stock was done and I strained out all the bones and bits of veggies. This made about 8 cups.
Chicken Soup - 8 servings
Now I put the stock back on the burner with a cup of rice, one large fresh sliced carrot, one stalk celery and left over diced onions (0.5 cups) from earlier in the week (which I had frozen). I let this simmer with some salt (2 tbsp), thyme and oregano (tbsp of each) for about 30 minutes. Proportions are up to you, and how much you want. The recipe I had called for specific amounts of rice and veggies, but I just went with what I wanted. Then I added in most of the dark meat from my chicken and leftover roast veggies (from when I made the whole chicken) and cooked for about another 15 minutes. It made about 8 servings of soup, half of which I will freeze on the morrow.
Chicken Salad - 4 servings
The chicken breast I had I diced up (about 2 cups of bite sized chunks!), with some celery and onion. I added some Miracle Whip (mayo if you hate MW) and voila! Chicken salad. Since most of the rosemary butter spread I rubbed on the whole chicken remained on the breast meat, I had an herbed chicken salad instead of a plain one. Score! I suppose you can also add herbs yourself, but it was one less ingredient I had to add so that's a plus in my book (even if accidental!).
Results and Conclusions
Dan liked it all, and between the first meal and what I made today, we got 15 meals from one bird. I am pretty excited since it cost less than what I normally spend on just chicken breast, and we got a lot more food from it. The different parts also forced some variation from grilled or baked chicken breast. Some dark meat once in a while is tasty!
Though pretty tasty, the soup needed a little more salt. I also wish I refrigerated the stock overnight so that I could skim some of the fat off. I skimmed a lot off the drippings, but I didn't take into account what came of the carcass and bones. It wasn't super greasy, but there was a little that could've been removed. I was just excited to make chicken soup, and get a few days of food cooked in one night. All the veggies were thoroughly cooked, so 30 min of simmer time was good. I did slice my carrots about the same thickness as canned carrots. If you do thicker or smaller, you can adjust the time so they cook longer or shorter.
The chicken salad was good. It's a pretty simple dish, and there are many other things that can be added. I looked for some grapes at the super market, but they had slim pickings for too high a price. I mean, those grapes were tiny! Golden raisins are good too. We ate it on its own, but you can put it on lettuce or celery stalks if you want.
Sources
- 75th Anniversary edition of Joy of Cooking by Irma S. Rombauer, Marion Rombauer Becker and Ethan Becker.
- Myself
Tuesday, January 29, 2013
Roasting a Chicken... for the first time.
I took the chicken out of the bag it came in. That was pretty gross and slimy. I'll spare you the pictures. Also, I avoided taking any at this point because my hands were... yup... covered in chicken juices. The second thing I noticed was it had a pop-up timer, which is cool for first timers. So I plopped this thing in a large glass casserole dish and removed the giblets. I lack a proper roasting pan, but this works. Now I know I have to dress up my chicken a little. Guided by several sources I decided on this:
Mix 2 tablespoons of softened salted butter with 4 tsp of rosemary (I used dried) and garlic (however much you'd like). Now comes the tricky part: putting the butter under the skin. After exploring the anatomy of a roasting chicken for longer than I would have liked, I found where I could slide my hands between the meat and skin. I managed to get some butter on the chicken breasts and thighs. I was pretty proud of myself there, and gave up on getting it under the skin on the drumsticks without tearing it. I then coated the breasts (facing up in the pan) with olive oil, then tented some aluminum foil over the chicken.Into the oven preheated to 450 degrees. I then turned it down to 350 (as it would sear/brown the chicken, apparently, when it's put in but then the temperature is lowered so it won't dry it out).
I cooked it for an hour, then tossed in a bunch of veggies: chunks of white potatoes, carrots, celery and onions. After about 15 minutes in the oven, I had enough juices to baste, so I did that. I then removed the foil so the skin would crisp up. After a little over another hour, it was all set!
Note: 20 min per pound at 350 is good for a roasting chicken. I waited for my pop-up timer though.
The finished product! The chicken was $8.78 (~7.5 lbs.) The veggies and butter ~$2. We'll be eating a bit of this tonight, but the rest will be incorporated into dishes for the rest of the week, or frozen. I will also be using the bones and drippings to make chicken stock. Very cost effective to get the whole chicken!
Results and Conclusions: The chicken was pretty tasty. Most of the rosemary was concentrated on the chicken breast, and overall I think I had too much of it in there. The skin was a perfect crispiness though, so I will keep the same amount of olive oil and butter next time. I will also put my veggies in just a little earlier next time since a couple of the carrots/potatoes weren't 100% soft/cooked through (though still very tasty). I also noticed I didn't salt the chicken at all. I usually don't add salt until I eat, if I do at all. I didn't think it needed it, but you are welcome to salt your chicken before hand, or even try out brining!
.JPG) |
| Pretty little chicken! |
 |
| These things are vegetables. |
 |
| Foil off, not done yet! |
I cooked it for an hour, then tossed in a bunch of veggies: chunks of white potatoes, carrots, celery and onions. After about 15 minutes in the oven, I had enough juices to baste, so I did that. I then removed the foil so the skin would crisp up. After a little over another hour, it was all set!
Note: 20 min per pound at 350 is good for a roasting chicken. I waited for my pop-up timer though.
The finished product! The chicken was $8.78 (~7.5 lbs.) The veggies and butter ~$2. We'll be eating a bit of this tonight, but the rest will be incorporated into dishes for the rest of the week, or frozen. I will also be using the bones and drippings to make chicken stock. Very cost effective to get the whole chicken!
.JPG) |
| Yummy! |
Results and Conclusions: The chicken was pretty tasty. Most of the rosemary was concentrated on the chicken breast, and overall I think I had too much of it in there. The skin was a perfect crispiness though, so I will keep the same amount of olive oil and butter next time. I will also put my veggies in just a little earlier next time since a couple of the carrots/potatoes weren't 100% soft/cooked through (though still very tasty). I also noticed I didn't salt the chicken at all. I usually don't add salt until I eat, if I do at all. I didn't think it needed it, but you are welcome to salt your chicken before hand, or even try out brining!
$1.01 per meal ground turkey, beans and rice!
I love beans and rice, but hubby wants more protein so I added ground turkey to this classic.
I started by heating a tablespoon of olive oil in a pan on medium heat. I then added minced garlic (to taste) and then a healthy tsp of cumin and chili powder. Let that sizzle for about 30 seconds then add in 1.5 lbs of ground turkey. (Here is where I confess I bought 80/20 ground turkey instead of the usual 93/7 and I hang my head in shame at the amount of fat in it...) I cooked that until it was done, in the meantime preparing some veggies.
I diced up one medium sized (what does medium sized mean? I say slightly larger than a baseball, because I've seen some huge onions in my day) onion, then one stalk of celery. Make sure you wash your veggies. The bottom of the celery stalk had a bit of dirt on it. I only used about half the onion, but I diced the whole thing to prevent myself from having to dice it later on this week (suspense! what will I use it for?!?!?!?!). I sauteed the celery and onion in 1 tbsp olive oil + chili powder + cumin until the onions were starting to brown over medium heat. Then I added a can of black beans and let those heat up. I then added a can of diced tomatoes. This was my "sauce". Then I cooked 2 servings of rice (1/4 cup dry).
During the 15 minute wait period, I decided to count my calories (and this is where I noticed my error with the turkey). I found splitting the recipe into 6 servings would equate to 370 cal per serving. Rice is 160 extra, so it's your call how you'd like to proportion it. I split my turkey into 3 equal portions, and put two of them in separate plastic baggies, with equivalent portions of sauce. There's 2 meals for Dan AND me (so 4 total), already set to go.

The remaining turkey and sauce I combined, and spooned over my rice (which was..... spiced with cumin and chili powder!). I served with a bit of shredded cheddar cheese (optional) and homemade tortilla chips as a garnish. Fresh cilantro would also be great in this dish, but I did not have any on hand.
Calories: 530 cal (with rice) + garnishes (~100)
Costs:
Turkey $3.50
Beans: $0.75
Rice: $0.90 (I think)
Tomatoes: $0.43
Celery: $0.20 (rough estimate)
Onion: $0.30 (rough estimate)
Total: $6.08, or ~ $1.01 per meal
Garnishes are optional, and I excluded those from calculations.
I started by heating a tablespoon of olive oil in a pan on medium heat. I then added minced garlic (to taste) and then a healthy tsp of cumin and chili powder. Let that sizzle for about 30 seconds then add in 1.5 lbs of ground turkey. (Here is where I confess I bought 80/20 ground turkey instead of the usual 93/7 and I hang my head in shame at the amount of fat in it...) I cooked that until it was done, in the meantime preparing some veggies.
 |
| Turkey and spices! |
I diced up one medium sized (what does medium sized mean? I say slightly larger than a baseball, because I've seen some huge onions in my day) onion, then one stalk of celery. Make sure you wash your veggies. The bottom of the celery stalk had a bit of dirt on it. I only used about half the onion, but I diced the whole thing to prevent myself from having to dice it later on this week (suspense! what will I use it for?!?!?!?!). I sauteed the celery and onion in 1 tbsp olive oil + chili powder + cumin until the onions were starting to brown over medium heat. Then I added a can of black beans and let those heat up. I then added a can of diced tomatoes. This was my "sauce". Then I cooked 2 servings of rice (1/4 cup dry).
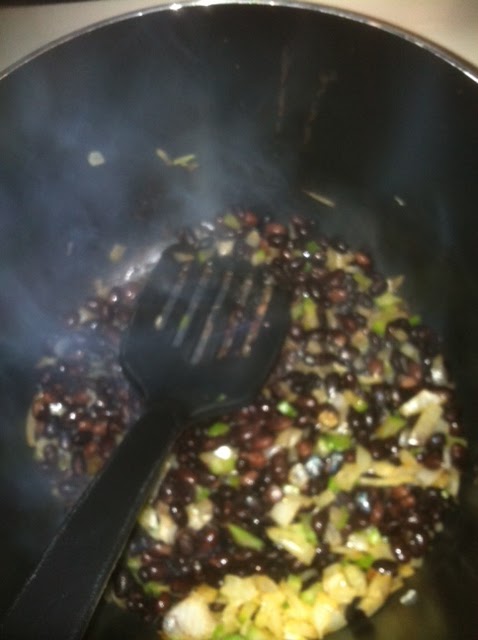 |
| Onion, celery and beans! |
 |
| Sauce! |
During the 15 minute wait period, I decided to count my calories (and this is where I noticed my error with the turkey). I found splitting the recipe into 6 servings would equate to 370 cal per serving. Rice is 160 extra, so it's your call how you'd like to proportion it. I split my turkey into 3 equal portions, and put two of them in separate plastic baggies, with equivalent portions of sauce. There's 2 meals for Dan AND me (so 4 total), already set to go.

The remaining turkey and sauce I combined, and spooned over my rice (which was..... spiced with cumin and chili powder!). I served with a bit of shredded cheddar cheese (optional) and homemade tortilla chips as a garnish. Fresh cilantro would also be great in this dish, but I did not have any on hand.
 |
| This is really a lot of food for the calories! |
Calories: 530 cal (with rice) + garnishes (~100)
Costs:
Turkey $3.50
Beans: $0.75
Rice: $0.90 (I think)
Tomatoes: $0.43
Celery: $0.20 (rough estimate)
Onion: $0.30 (rough estimate)
Total: $6.08, or ~ $1.01 per meal
Garnishes are optional, and I excluded those from calculations.
Saturday, January 26, 2013
Adventures in Breadmaking: The Yeast, they are rebelling!
Cheese Bread - a recipe from Joy of Cooking
30 minutes: It was necessary to punish the yeast. They refused coexist with the other ingredients. They are a reclusive bunch, and I see them in groups, refusing to let the other ingredients into their circle. I had to beat them into submission for ten minutes until they became well blended with the rest of the cheese bread society.

31 minutes: The colony, resembling a "melting pot" of ingredients now, has returned to a peaceful state.

60 minutes: The cheese bread society has begun to fester. The yeast, outcasts of society, have begun a revolt. The ingredients are trying to avoid interactions, and have begun to migrate from the center of Bowl.

90 minutes: In a dire move to escape the rebellious yeast, the ingredients have migrated to the outskirts of Bowl. They are impeded by knowledge of the unknown. What lies beyond the borders of Bowl? Is it safe? If they cross it, will they just end up back in Bowl after years of traveling? Their helplessness drives them to continue their exodus.

92 minutes: There has been yet another revolt resulting in the formation of two factions. The city itself was split down the middle, and those who wanted peace continued to the town of Casserole while the others traveled in the opposite direction, to the town of Pan. The yeast, with no goal but destruction of civilization split and followed both groups.

125 minutes: The yeast have begun to cause more civil unrest. I must unleash the heat of a thousand ovens on both societies, a modern day Sourdough and Gomorrah, to purge the otherwise peaceful world of Casserole and Pan of evil.

155 minutes: The rebellion has been quashed. Both colonies have joined forces again, and stabilized.
.JPG)
Replenishing my Stockroom :)
2 days ago: "One can of vegetables, 2 boxes of pasta, a bit of rice and a can of sauce. Oh ya, and a 2 lb bag of frozen corn (why so much corn???) and ~5 lbs of raw onions. I guess I can make a couple dinners... Time to restock!
Now since I was out of almost everything, I decided it was time to invest in large quantities of food and get it for cheap. I want to make my own breads, rolls and desserts (I don't have an obsession with carbs at all, I swear). I also want to cook cheap. These two things go well together, and my list of baking goods is posted below. On the topic of cheap, and healthy, I decided to add to my list some beans, lentils and split peas. For the serving size, these guys stick to your bones, can be added to many dishes and have a good chunk of your daily protein. I don't like to eat meat a lot, so that helps me out! (Though Dan will surely eat what I do not). I researched meat, and what was cheapest and decided whole chickens, rump roast and chuck are the best bang for my buck. I also added the basic staples: canned veggies, milk, eggs, margarine (for baking), butter (limited use) and cheese. Below is a comprehensive list of what I bought (though not comprehensive as to what I have in my pantry), as well as costs and where I bought it. I compared the local grocery store (G) to a wholesale store (W), and an international food store (I) to see who had better prices per pound, oz, quart, etc. Units will be marked :)
Veggies and Legumes
White Potatoes $0.40/lb (G)
Sweet Potatoes $0.76/lb (W)
Fresh Carrots $0.80/lb (G)
Celery $2/head (G, W did not have what I wanted)
Split Peas $1.49/lb (G, none at W)
Lentils $1.07/lb (I)
Black Beans (canned) $0.92/lb (G)
Refried beans $1.79/lb (G)
Diced Tomatoes (canned) $0.71 (W)
Beets (canned) $0.80/lb (G)
Green Beans (canned) $0.76 (G)
Wax Beans (canned) $0.76 (G)
Fruit
Diced pineapple $7.49/120 oz canned
Meat
Chuck Roast $2.99/lb (G, for 4+ lbs)
Rump Roast/Stew Beef $3.89 (W)
Whole Chickens $1.19/0.99 (W, large/small chickens)
Dairy
Milk $3.00/gal (G)
Margarine $1.09/lb (G)
Butter $2.00/lb (G)
Cheddar Cheese (shredded was cheaper than block) 3.10/lb (W)
Eggs (not quite dairy... not quite meat) $1.46/dozen (W)
Evaporated Milk (for baking) $0.99/12 oz (G)
Grains
Rice $0.49/lb (W)
Baking Supplies
Lime Juice $1.99/12oz (W)
Vinegar $1.69/qt (G, small bottle needed)
All-Purpose Flour $0.50/lb (W)
Bread Flour $0.66/lb (G)
Whole Wheat Flour $0.80/lb (G)
Cornmeal (stone ground) $0.80/lb (G)
Quick Oats $1.52/lb (G)
Instant Yeast $1.25/lb (W, HUGE savings here)
Kosher Salt $0.76/lb (W)
Confectioner's Sugar $1.00 (G, but cheaper at W, did not want that much though!)
That was my list. Considering the weights of the items (i.e. flour comes in 10 lbs at wholesale, 5 lb bags at grocery), my total for food this week was: $136.78
Now I'd like to mention, I got 3 chickens, 4 lbs of chuck and 3 lbs of stewed beef. The chickens I can also use to make stock! But yes, this is a lot of meat. Not a weeks worth, but probably could last us a month. Notice I didn't get any bread? I will only be baking my own. I have 25 pounds of flour, and 5 of cornmeal. That will make quite a few loaves, and tortillas! As the weeks go on, I will keep you all updated as to how long this food will last. I'm pretty sure I can make it a month easy, with the meat as my limiting reagent :)
I will try to incorporate prices per meal as well, since some people like to compare how much food would cost in a restaurant to making it at home.
Thanks for reading!
Friday, January 25, 2013
Chicken quarters... what do I do with them? (Recipes inside)
Chicken quarters... what do I do with them? (A 4 serving recipe)
Earlier this week I got chicken quarters (drumstick and thighs connected, with skin) at the grocery store. They were on sale for $1/lb, which saved me money over buying a whole chicken ($1.59/lb). I picked up a pack of 5 (though I initially thought it was only 4, but I guess that is irrelevant) and figured I'd bake them. Who doesn't love crispy chicken skin, right? Inspired by a cabbage recipe in Joy for Cooking, I made my own cabbage casserole, baked chicken and biscuits. This was prompted by my desire to use some leftover cabbage (70 cents/lb). As I mentioned in my first post, I do not like to toss fresh veggies because I didn't plan out my meals. It is too wasteful! So I planned ahead.
Step 1: Plan my dinners. Fresh veggies? Use early in the week, and make sure you use them all. Buy only what you will consume.
Step 2: Prep what I can, and prep efficiently. I used 1/4 of my cabbage one night in a curry. So I shredded 1/2 of it (cut into wedges, then cut lengthwise so you get thin strips) and tossed it in a small (9x13) casserole dish to be used the next day.
Step 3: Cook!
After a long day of classes, it was nice to come home to a meal almost ready to go into the oven. The rest of the recipe is as follows:
- Add a cup of canned chicken broth to the cabbage, then placed two chicken quarters on top of it
- Sprinkle the chicken with salt and pepper, and then herbs of your choice (I used oregano and thyme)
- Cover in aluminum foil and pop it into the oven for 20 minutes.
- During this time I made 3/4 lb of bacon :) I diced it up and cooked on medium heat until done, then removed it with a slotted spatula to some paper towels on a plate. (use turkey bacon if you'd like, for a leaner option). This part is important: save the grease! It can be used later.
- After 20 minutes, I took the foil off the chicken and baked for another 30 minutes, until the juices ran clear from the chicken.
- If you have skin on your chicken, it will be kind of gummy/slimy. I hate that texture, so I broiled on high for a few minutes to crisp up the skin.
Stop here if you'd like to be extra healthy, and skip down to Step 4: Serve! If you want to continue with some more... flavorful options... continue reading at your own risk :)
Grab some sour cream (low fat or nonfat works well, I used low fat at 40 cal per 2 tbsp). With a spatula spread about a cup of it on the cabbage (enough for a thin layer). Remember that bacon? Of course you do. It's delicious. You may have nibbled on some while you waited for your chicken to finish. You may have not. We won't judge you either way :) Toss that on top of the sour cream.
You may think I stopped here. It's already an amazing dinner, but I kept on chugging. In an attempt to cook without waste, I saved my bacon grease because I wanted biscuits. Light, fluffy, flaky biscuits. Mmmmm. I made biscuits per the recipe in Joy, but substituted bacon grease for shortening. The important part here is to make sure the grease is solid and not liquid. So I popped it into a ramekin and threw it in the freezer. After pacing, peeking in the freezer and painstakingly waiting for the grease to solidify, I made my biscuits. I'll be honest, they weren't quite as fluffy as I would have liked, but I'm not a master of dough yet. They did have the right texture at least, and were very tasty.
Step 4: Serve!
My cooking adventure took about an hour and a half, where most of the time was waiting for things to bake. I use that time to do dishes, clean the counters, etc. It really works out well that way. Now my chicken is down, the cabbage looks awesome and I have my highly sought for biscuits. Now one thing I learned about portion sizes: mine are way too big. How do I decrease them? Here are some helpful tips:
1. Figure out the portion of meat you should eat. I split one quarter in half, drumstick and thigh. I had the thigh and Dan ate the drumstick. A perfect serving of meat.
2. Try to do the math and add up the calories for your meal before you serve it. That way you know what size serving you want.
3. Use smaller plates. I have some salad plates (8" I believe) which are significantly smaller than my dinner plates (12"). That helps when you really want to chow down, and try to overload your plate. You can't in such a small space!
The casserole was 736 calories (via MyFitnessPal). The chicken was 300 calories per quarter and the biscuits were 55 calories each (including the grease calories).
Total per serving (4): 334 calories, plus 55 for a biscuit.
Woah woah woah!!! Only a 334 calorie meal, and it had bacon... and sour cream? How did this even happen? Portion size and veggies! Cabbage is super tasty, and is low in calories. Chicken had some fat, but when you limit what you eat you can splurge a little with the additions. This left me full and satisfied, with a full portion for lunch the next day.
Now what did I do with the extra quarter of cabbage and 3 chicken quarters?? I made soup! I had extra chicken broth, so I put a cup of it in my slow cooker. Then I added a cup of lentils (I will probably dedicate a post to these and beans at some point soon), and 4 cups of water. I browned the remaining 3 chicken quarters, and put them in the slow cooker. You can season your chicken with salt, pepper and whatever herbs you like, by the way. I then sauteed a sliced onion (slice how you like) in the same skillet I browned the chicken in, then added that plus the rest of the cabbage (shredded). Cooked 4 hours on high, and it's done! Another 6 meals worth of meat, and about 4 worth of lentils and veggies. Keep in mind, you don't have to eat it all for your next few meals. Soup is easy to freeze and keeps for several months. I have some chili frozen right now :)
Thanks for reading! Look forward to a post on baking supplies and prices when you buy in bulk. I will be stocking my kitchen with all necessary ingredients to make cakes, breads and decadent treats!
Thursday, January 24, 2013
First post. Here goes.
My husband and I (recently married in December) moved to our new apartment last August when I started grad school. While the first semester was light, just 15 credits, no research or TAing, this semester is starting to pick up. When we got married, we were essentially gifted every kitchen appliance known to man (well, not everyone, but all the essentials and then some). Our families were very gracious, and we also got some cook books. One of my aunts, who cooks a ton, gifted me a bunch of dessert books and an appetizer book awhile back. I was/am psyched I can use them now since I have all the necessary kitchen tools and appliances. And on top of that, I got the Joy of Cooking and a slow cooker cook book. I'm pretty much set with recipes (forever, probably).
So I'm also 23 and have never really cooked much more than I needed too. I can cook some pretty awesome pasta, and I know how to cook meat (so it won't kill me, or anyone else). I made many mixtures of beans and spices and veggies. And ya, did ya know you could toss that on rice?
Anyways, I never made anything from scratch. I mean, who would bake their own bread when they can just buy it for $1 at the grocery store? Who has time to make dough for tortillas? Biscuits? French bread? For some reason I never thought about making the basics. But I am a chemist. And chemistry is very similar to cooking (more toxic, in some cases...). For example, an overnight reaction is similar to making a pot of chili. So naturally, I am now addicted to cooking, which is difficult for a graduate student. First off, I am only cooking for two so I have to scale down a lot of recipes or freeze a lot of food (which is an option I will explore in later posts, but as of now, I lack the proper amount of storage containers). Second, I don't have a ton of time now. Research and 5 classes, plus household chores. It adds up pretty quickly. Third, I'm going to work on a budget. Not out of necessity, but out of curiosity. I find this also makes me think of what I am going to get, so I don't waste food. Nothing is worse than tossing half the fresh veggies I bought because I didn't plan my weekly meals out the right way. I'm already starting to plan my meals out like I plan out an experiment. (1. slow cook whole chicken with veggies 2. use juices for stock 3. make lentil soup using stock 4. use stock to make a curry, etc.)
So I mentioned my cookbooks. They help keep me organized with my planning. I like to call them cooking textbooks, because they really are. The Joy of Cooking is a resource everyone should have, a reference material that belongs in every kitchen. In just the past week, I made my own tortillas and biscuits and they were delicious!!! Plus, in the long run it saves me a trip to the grocery store, and it's much cheaper. I never thought I'd actually put time into making these, because for the most party, they already ARE cheap items and I felt like they'd take forever to cook. But they didn't take up my whole day and yes, you can make them even cheaper than what they offer at the grocery store. But that's not really why I'm going to write this blog.
I really love to eat healthy, tasty food without sacrificing ingredients I love. And I want to share that with my family and friends. Because I know a lot of you like to eat too :) This blog can be a way to exchange recipes and share ideas. For instance, my biscuits weren't perfect. Why not? Maybe someone else made them and can tell me what I did wrong. I also think this will promote healthy eating, as I am trying to change my lifestyle to incorporate more veggies, less fat and not as many (but still some) carbs (I'm addicted to pasta, so we'll see how well it goes...). And when you make your own food, you know what goes into it. You can keep track of calories (if you want to) and modify recipes so they're lower or higher in caloric content, fiber content, etc. I'll be keeping track of what I make, the costs and calories, including carbs/fat/protein per serving via myfitnesspal.com. Eventually, I hope to create a list of basic ingredients everyone should have to cook with. Especially for cooking from scratch. Until then, let's experiment!
Subscribe to:
Posts (Atom)